To set up a corflute sign or a sign that has a custom cut, we require artwork in the following format:
- A PDF with artwork set to 100% of the actual file size (i.e. if your sign needs to be 1000mm - ensure your artwork is 1000mm)
- CMYK Colour mode with all fonts outlined and images embedded
- 3mm bleed and crop/trim marks
- High resolution images - if your images look pixelated on your screen - it will print that way 🙂 We recommend simply purchasing the highest size stock image. 300dpi is recommended.
For custom cutting:
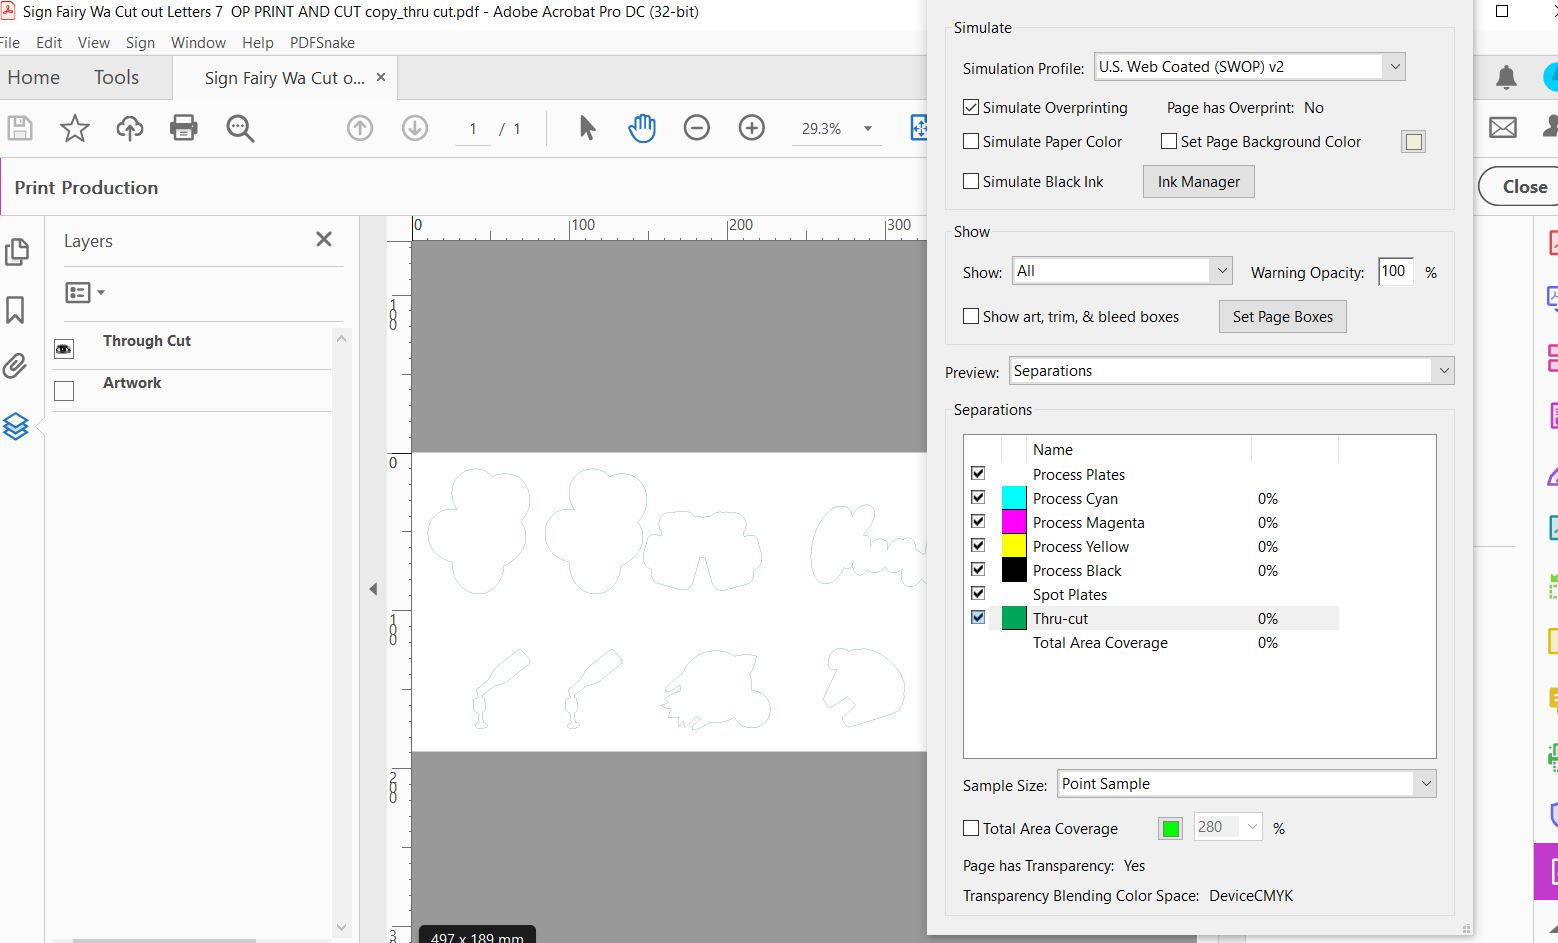
- The artwork should be on a separate layer to the cut line (or, knife line - the shape that is to be cut out). See image below for reference.
- Name the cut line layer 'Thru-Cut'
- Create the outline of the shape (i.e. using the pen tool or copying and pasting the shape, merging it using pathfinder tool in Illustrator) on the Thru-Cut layer. Ensure this is in the same place and size as the artwork.
- Assign a SPOT colour (any spot colour is fine) to the stroke/outline and name the spot colour Thru-Cut. See image below for reference.
- Save as a Press Quality PDF (ensuring all steps above are followed - i.e. the artwork is CMYK, file is the correct size, etc)

Thru Cut Example
For the best outcome, use professional design software or hire a designer to set the artwork up for you.
We have free print templates (.indd and .pdf formats) available here.